Pen Review: Kaweco Fantasie Pen

fantasy-pen.com
Kaweco Fantasie Pen
Length Capped: 141mm
Length Uncapped: 127.5mm
Length Posted: 175.5mm
Section at Thinnest Point: 8mm
Section at Widest Point: 9mm
Weight with Converter: This will vary a little (you'll see what I mean in a second!) - my pen is 56.4g
Fast Writing: Keeps up very well
Line Variation: You can squeeze out a little
Upside Down Writing: Scratchy on cross strokes, but gives a nice extra-fine line
Wetness: Medium
Pros: Neat concept, uniquely yours, great nib, makes a great gift
Cons: Thin section, can be challenging if you don't have the right tools, booklet templates aren't to scale
Most folks in the pen community are fairly familiar with the Kaweco Sport line of pens, the Student, the Liliput and the Allrounder - but I've seen very few, if any, references to the Kaweco Fantasie pen. The Fantasie (or Fantasy if you're in the US) pen is a very unique writing instrument in that it doesn't come to you in the completed state. Instead, it is designed to be individually decorated by the user with FIMO modeling clay. When I had decided to get the pen I didn't even realize that there was anything special about it until I checked out Kaweco's website - I really love this idea! It's a great way for people to get a great writing fountain pen in a design that's all their own. The mastermind behind this awesome concept is Kaweco's CEO Michael Gutberlet, who is also the chief designer at the company. The Fantasie some in both a fountain pen and ballpoint versions, for those of you who've not come to realize the amazing world of fountain pens just yet.
The pen is designed to be completely disassembled so that the clay can be applied to the cap and barrel, and then hardened in the oven. It comes with a handy booklet that explains the process in great detail with a lot of pictures. After going through the booklet and seeing what all I needed, I headed to Hobby Lobby to grab some clay. Of course, my local Hobby Lobby didn't carry the colors that I wanted in the FIMO brand, so I grabbed some Sculpey instead. Either will work, just be mindful that the baking temperatures can vary by brand. I chose red and black for my Louisville Cardinals (I should mention that I'm also a Hoosiers fan since I am originally from the other side of the river). A single block of clay will cover the pen with plenty left over, so if you're going for multiple colors you'll have more than enough to go around if you happen to mess up your design.

I had my clay, an X-acto knife, an old cutting board and a rolling pin and was ready to get to work. You'll note that the first bit of instructions in the booklet mention that if you work the clay for too long that the colors will mix together and a new color will be formed - this definitely happened to me, so be sure to make note of that when you're working colors together. After I'd sufficiently swirled my clay and had a fairly decent little design, it was time to roll it out and cut it. The booklet has a page with a couple of boxes on it that seem to indicate that they can be cut out and used to measure when you cut your clay - this unfortunately turned out to be completely false, as they were nowhere near close to scale. That was frustrating, because then I had to track down a ruler with millimeters which I didn't end up having in my house. Ultimately I used my calipers which were a little painful, but got the job done.
If you're not a regular user of clay, as I am not, then you'll find that it's very difficult to get the exact thickness of the clay without a clay rolling machine. This proved to be the most challenging part of the process for me, and I ultimately ended up just guessing. In an effort to avoid completely deforming my cutouts, I decided I'd put them on and sand away anything that was too thick after it baked. One they were wrapped around each part of the pen, I used the flat surface of my cutting board to roll out any creases and imperfections. I used my X-acto knife to cut away any jagged edges on the ends, and then it was time to bake!

Before you throw anything into the oven - make SURE that you've completely disassembled the pen, and have removed everything but the completely empty barrels. The pen will have a Standard International cartridge on the inside as well as a plastic o-ring for the cap - all of those must be removed before baking. The clip, nib section and finial should be removed as well. Once your oven is preheated, place the pieces standing upright on a baking sheet. I actually recommend you use a glass pan if you have it, because metal ones can tend to pop when heated and can cause the pieces to fall on their sides and flatten out the clay. If you're using FIMO clay, bake at 230 degrees Fahrenheit for 30 mins.
After the pieces have cooled, you'll likely notice that the clay has bubbled up in places like mine did. They weren't terribly noticeable but they definitely required some sanding. I had planned on sanding mine down anyways, so that wasn't a huge issue for me. When you do start sanding, make sure to use some masking tape to cover the chrome trim so you don't scratch it. I used 400 grit sandpaper, and it still took me FOREVER to sand the clay down flush with the metal trim - so it would have been really nice to have had a clay rolling machine handy. The ones at Hobby Lobby were priced at more than half the retail cost of the pen itself, so it just wasn't worth it to me.
Once you have everything sanded down, you'll notice that the clay has a dusty white residue from the sanding. I recommend that you apply some gloss to finish off the pen, which will remove the dusty white look and seal in the clay from outside damage. FIMO has both glossy and silky matte varnish to choose from; of course my Hobby Lobby didn't have them, so I picked up some Sculpey gloss. Unlike the FIMO brand, the Sculpey didn't have a brush in the bottle to apply the gloss, so if you can't find the FIMO you may want to pick up a cheap tiny paintbrush to apply the gloss if you don't have one laying around. I would also recommend that you keep the tape on the metal pieces during the glossing process, so that you don't have to worry about having to scrape it off later. It makes the painting process a lot easier, and helps you get a more even coating. After the gloss completely dries in 24 hours, your pen is ready to use!
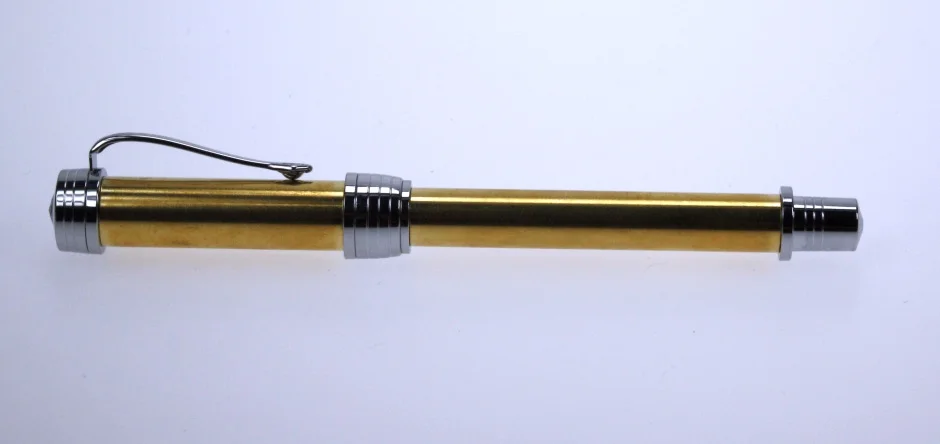
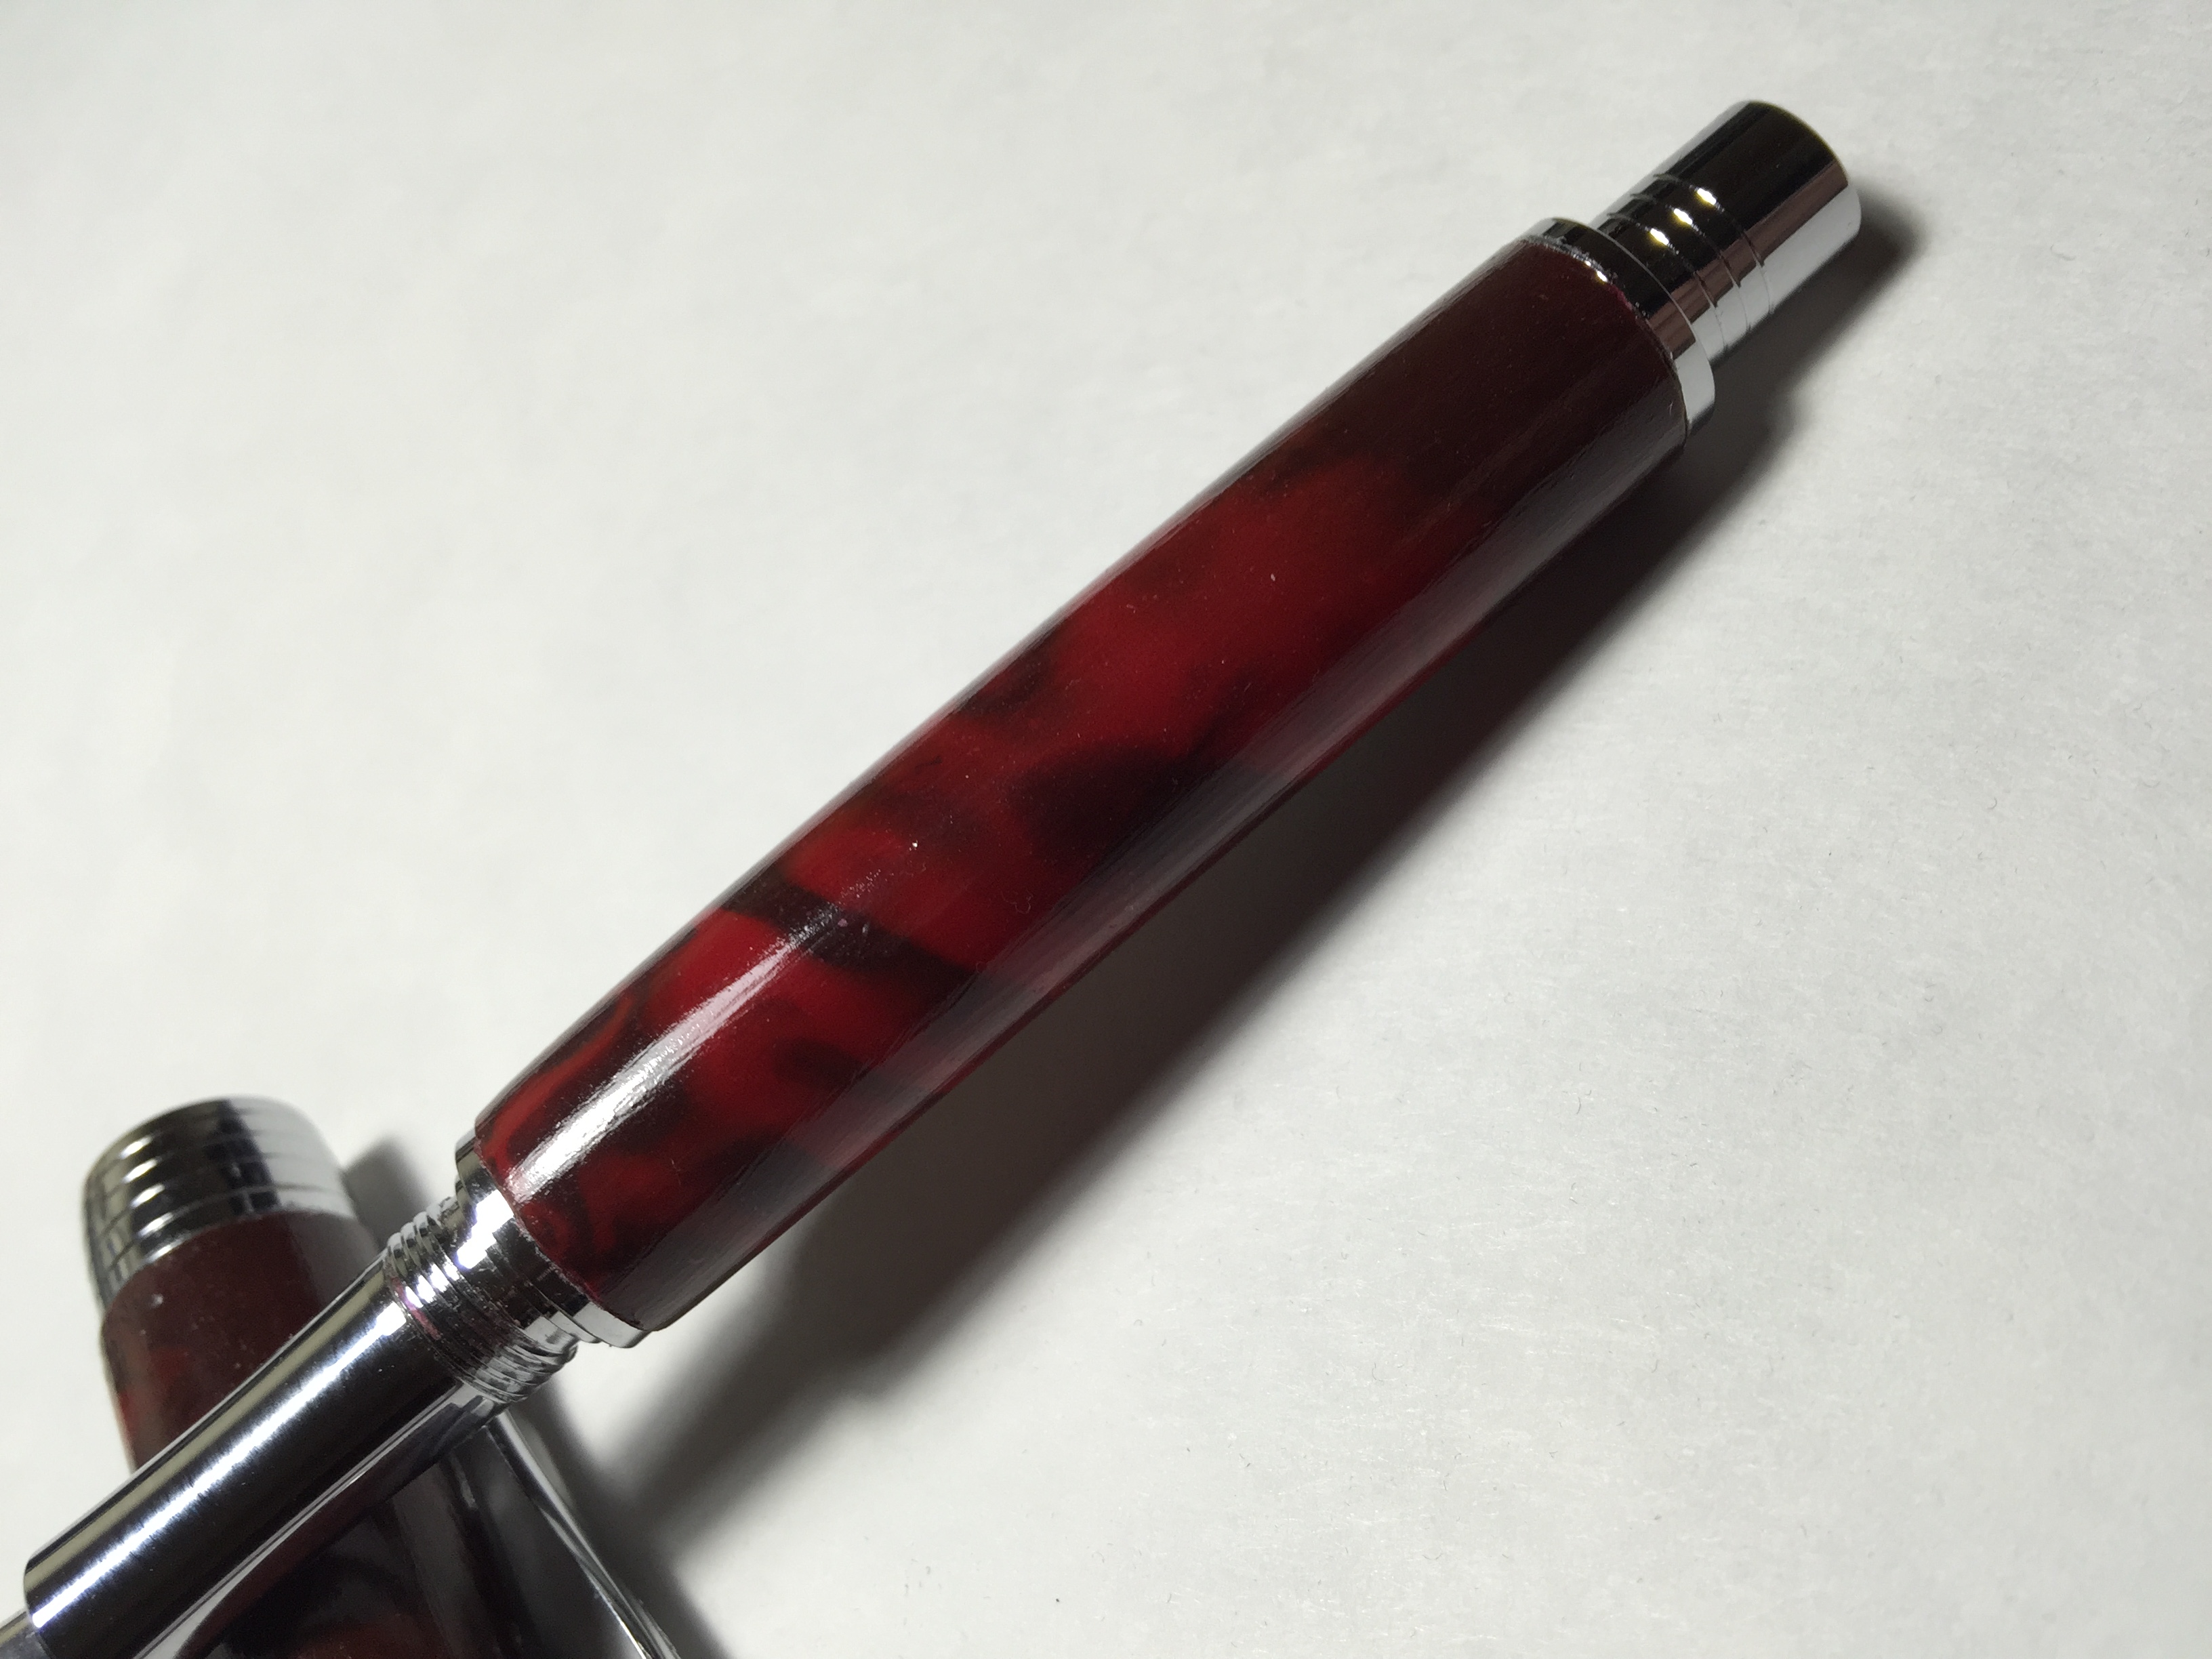
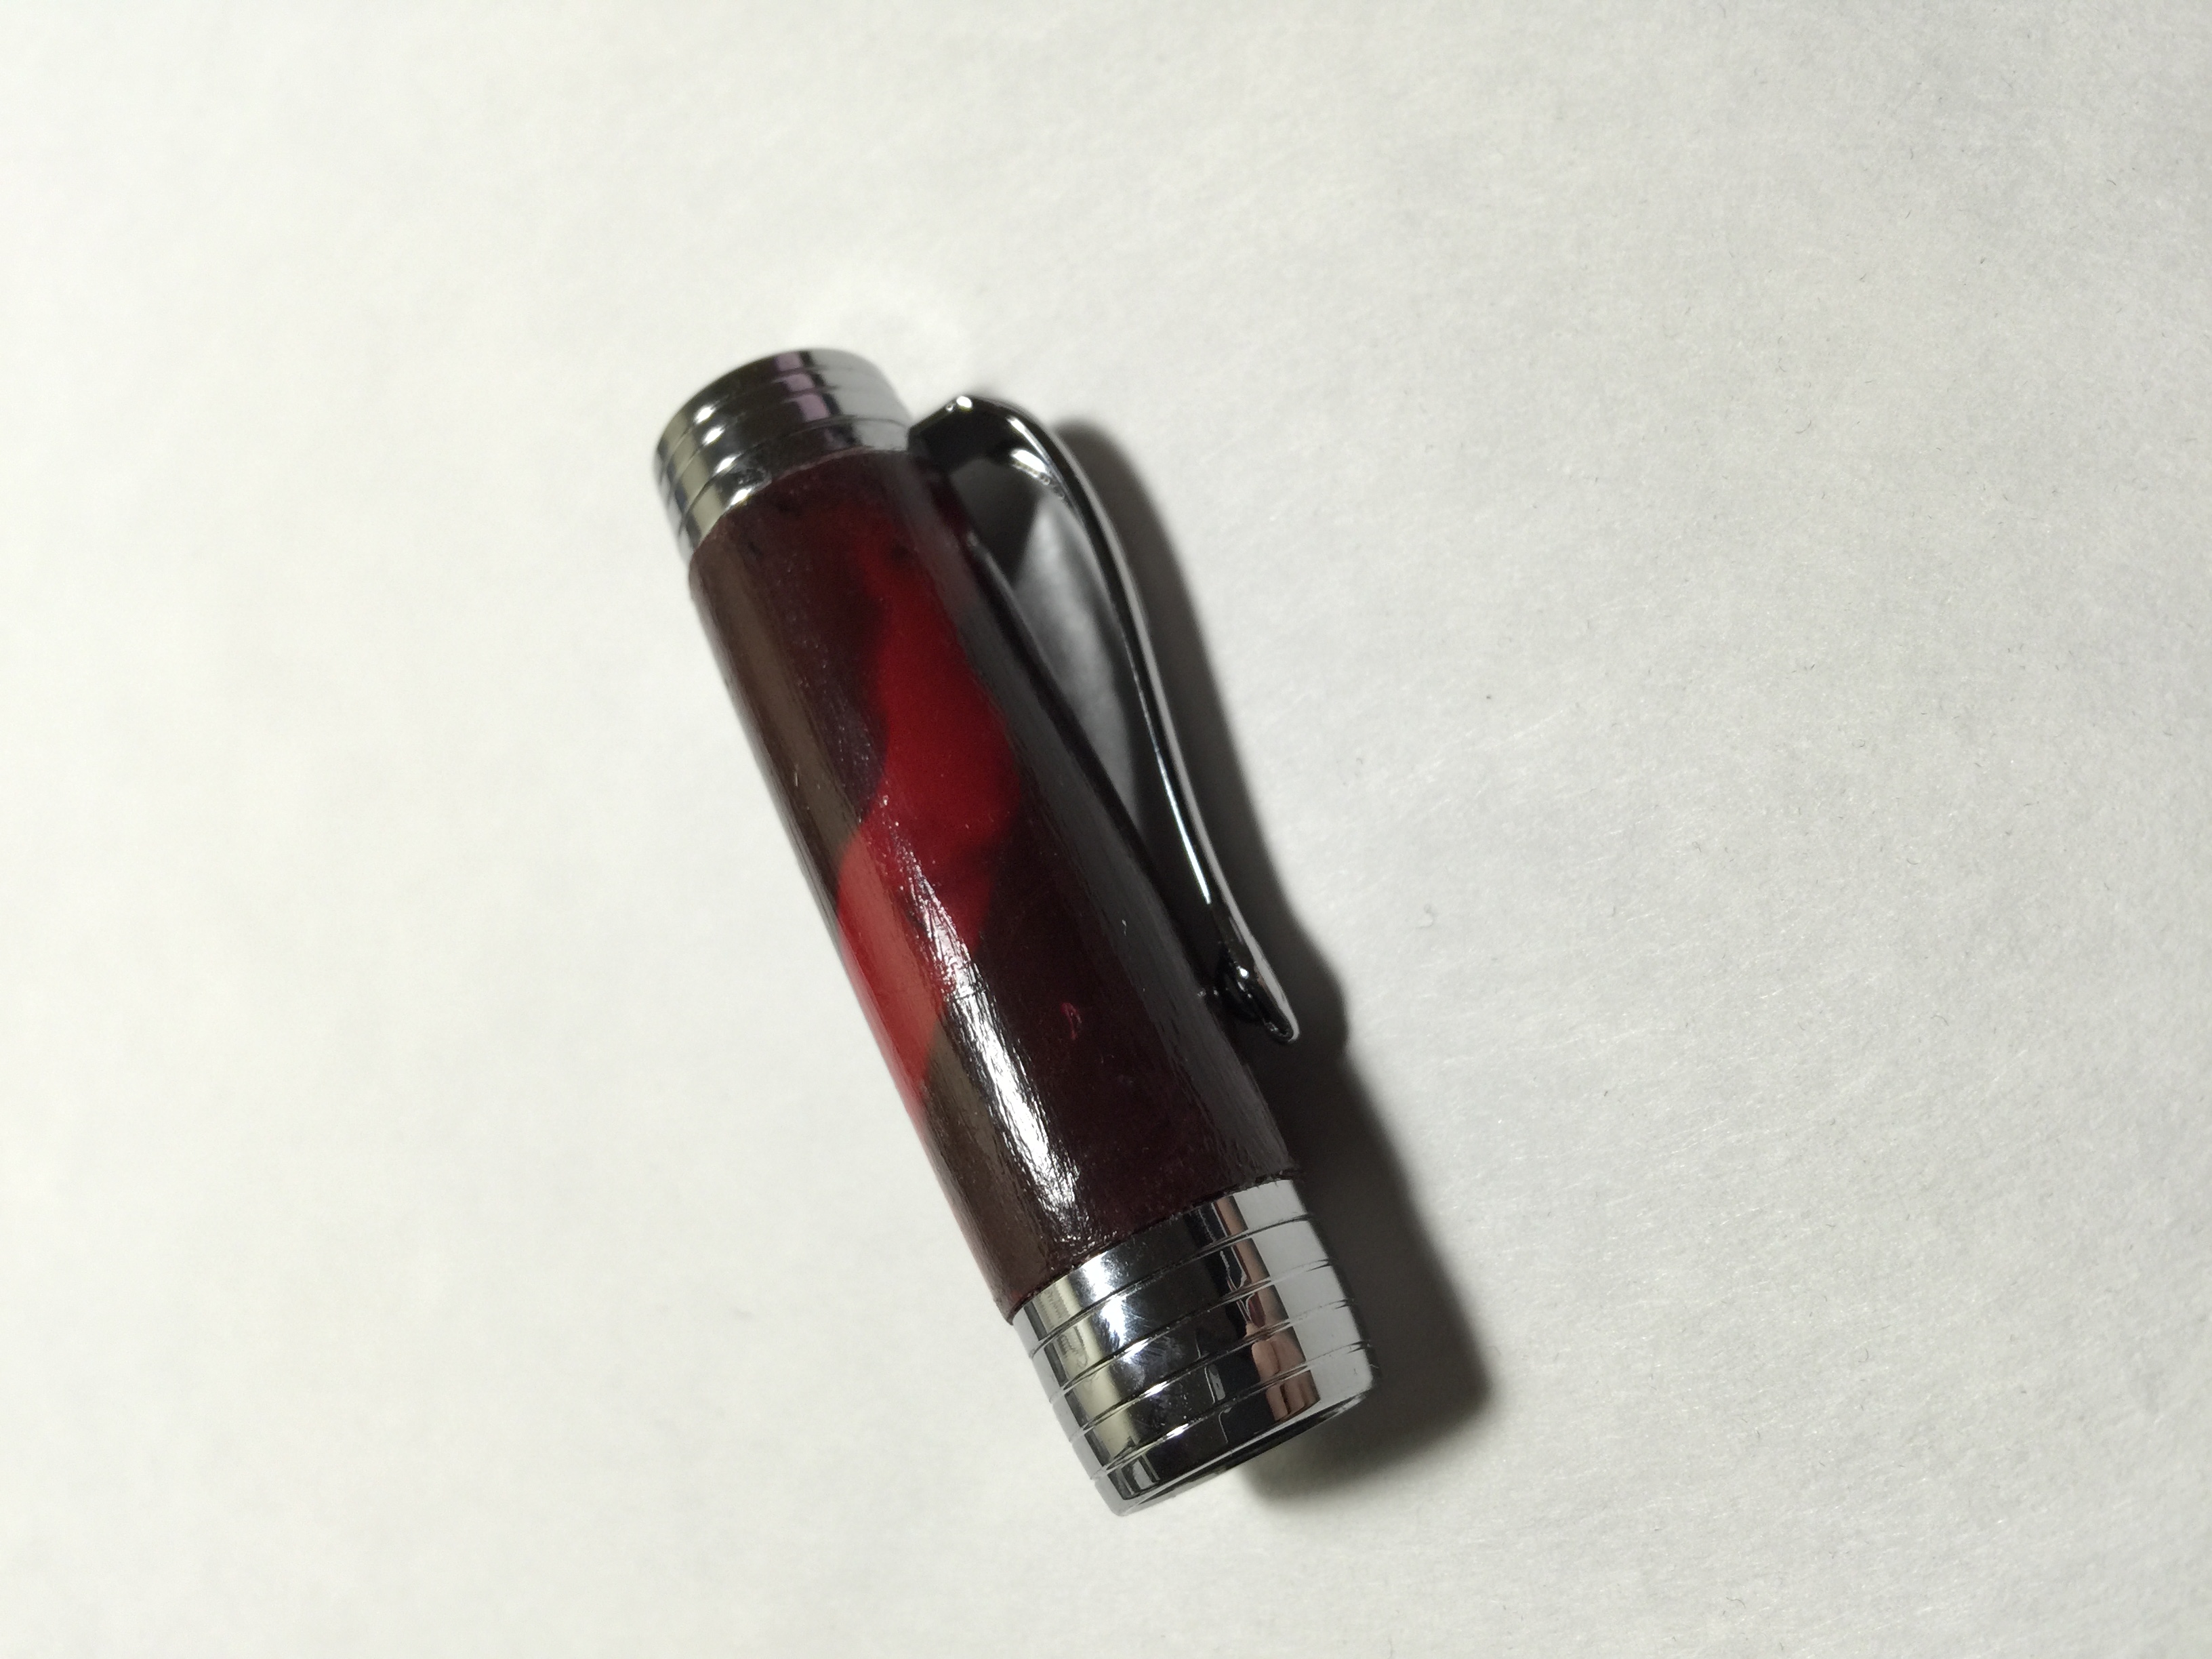
Finished product!
One downside to the Fantasie Pen is that it is only available in a Medium nib size. Since it's more of a novelty item, I assume Kaweco wanted to make it an easy "one size fits all" purchase. The nib on the Fantasie is not the standard small Kaweco nib size, but a large size steel nib (roughly #6 I'd say, or maybe even a tad larger). I was very pleased with how this nib performed - it's one of the smoothest steel nibs I've used. There were no skips, hard starts, and hardly any feedback at all. If you're getting this for someone that's new to fountain pens, they'll never go back to using a ballpoint or rollerball again.
Depending on how thick you put on your clay, the pen will vary somewhat in weight. I can't imagine it'll vary too much though, because there's only so much or so little clay you can put on here. Regardless, the clay does add some heft to it. Mine weighed in at 56.4 grams with the cap, and 30.3g without the cap. I do find that it's a tad back-heavy, but not so much as to throw it off balance. One thing that I really do not care for is how thin the grip section is. It's also a slick chrome which, when coupled with the thinness, can really start to fatigue your hand after a while.
The design of the pen itself is quite unique. It's a fairly long pen, right around the size of a Lamy AL-Star. The cap tapers up from where it meets the body to an overall girth that's slightly wider than the body of the pen itself. Unscrewing the cap takes a full 360-degree turn, so you'll have to reposition your hands at least one time to complete it. The clip is designed in such a way that it will give way to the extra thickness of the newly applied modeling clay. Once the pen is finished the clip is perfectly flush with the body, and is neither loose nor too tight. Posting with this pen is possible, though quite uncomfortable in my experience. It adds quite a bit of length, and makes an already slightly back-weighted pen VERY backweighted.
The pen takes a Standard International short cartridge, or standard international converter. I purchased Kaweco's SI converter from JetPens and it works quite nicely.
I had really fun time creating this pen, and now have a really nice-writing fountain pen that is uniquely mine. Some of the designs in the booklet are awesome, and makes me wish I were a little better at this stuff. I can't complain too much about how my design turned out - even if my black clay turned out to be a maroon color instead. I applaud Kaweco for once again stepping outside the norm and giving fountain pen users something inventive and fun to create on their own. This pen would be a great gift for the creative person in your life, and would be a great gateway into the fountain pen world.
If you're interested in purchasing one of your own, check out JetPens. They are the only US site I've found so far that sells the pen, and they also carry some colors of the FIMO clay for your convenience. I will mention that the price on their FIMO is about double that of a local hobby store, so you may be better off grabbing that locally. The fountain pen version costs $54.50, and the ballpoint is $40.50.
(Kaweco has provided this product at no charge to The Desk for the purpose of review. My opinions are honest and without bias - visit the About Me page for more details).